Halo Hair Extensions
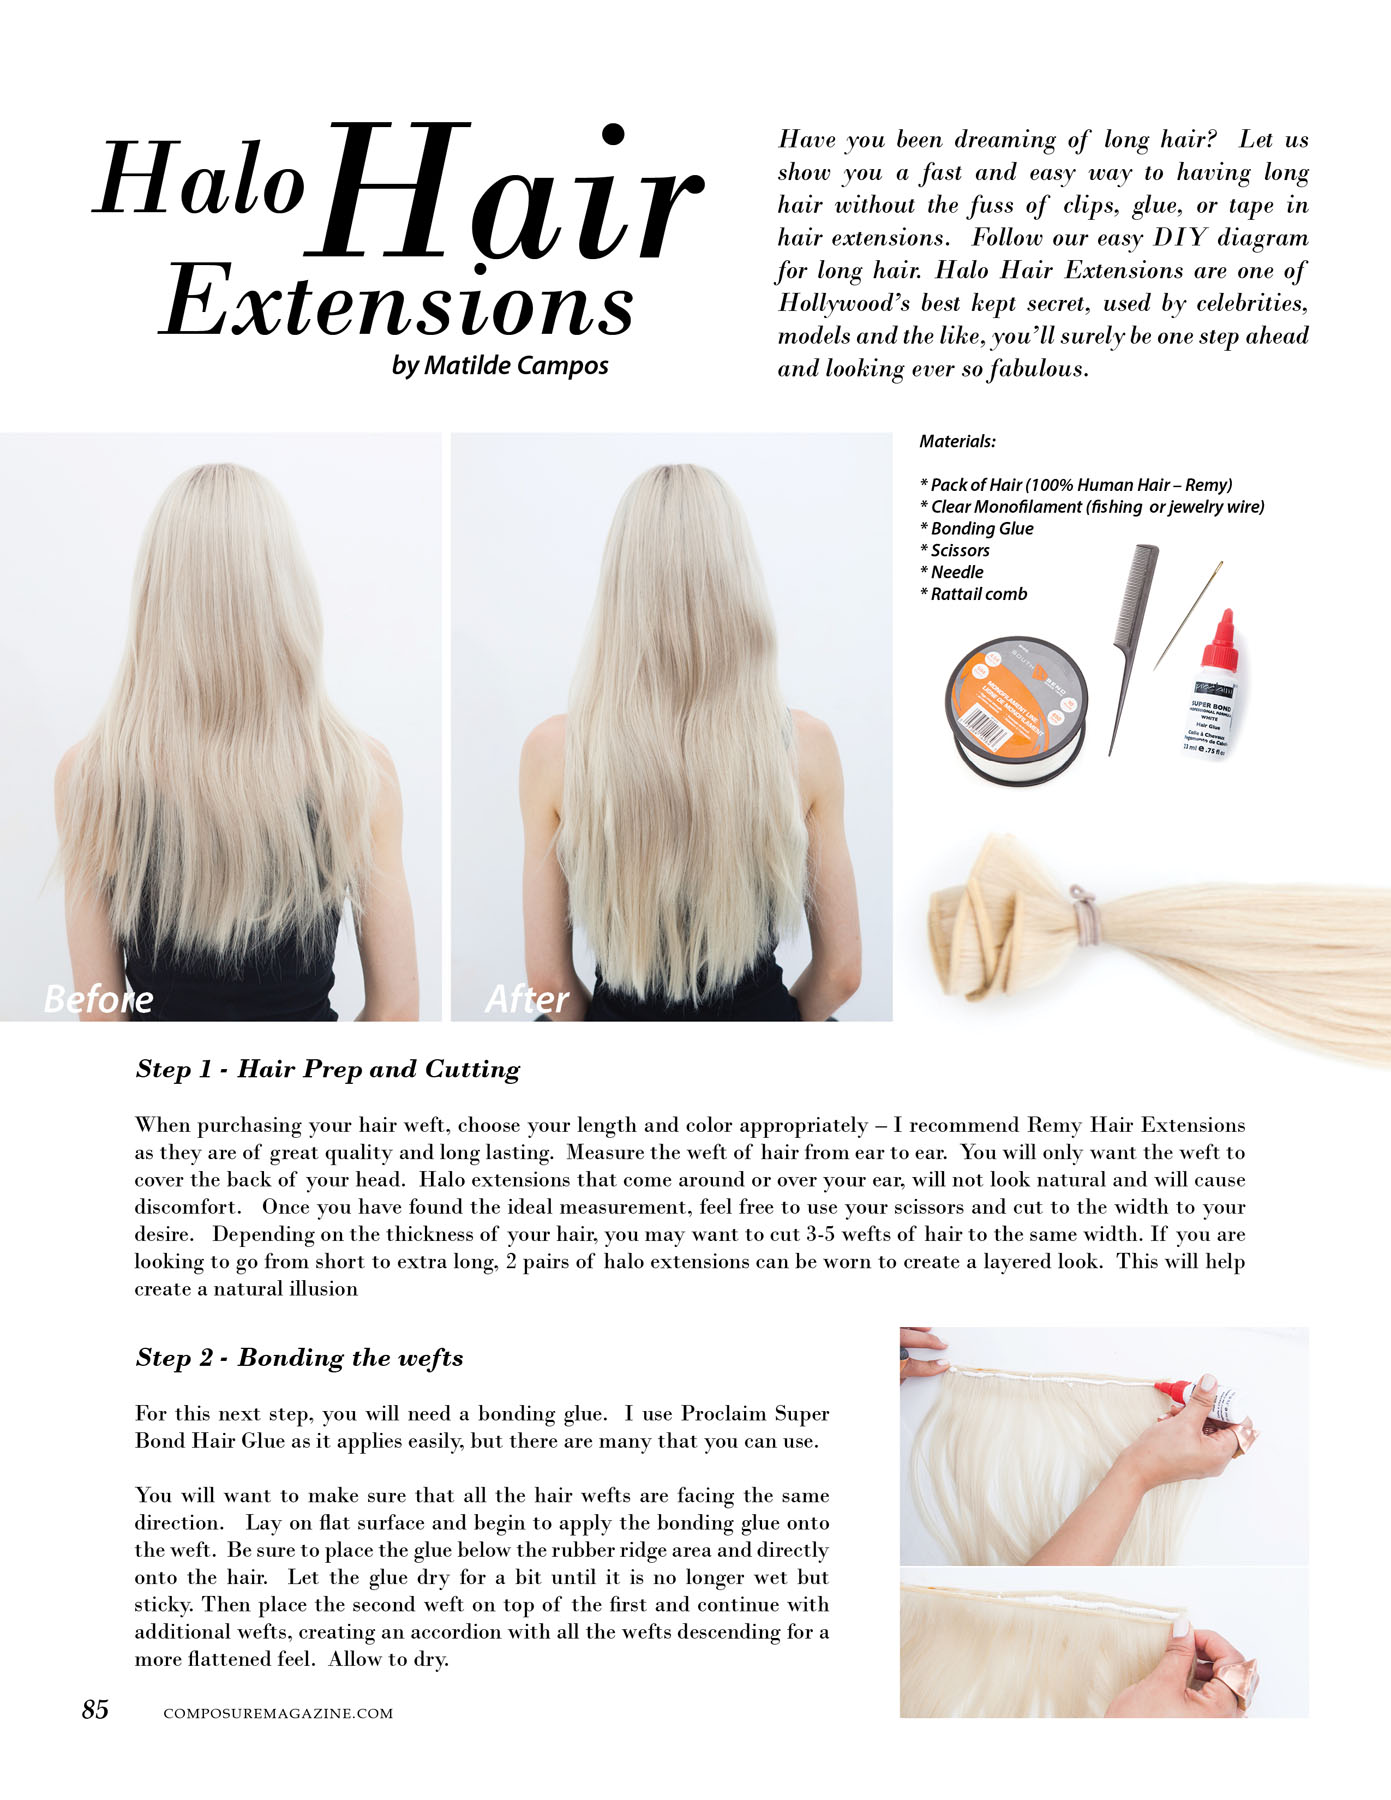
Have you been dreaming of long hair? Let us show you a fast and easy way to having long hair without the fuss of clips, glue, or tape in hair extensions. Follow our easy DIY diagram for long hair. Halo Hair Extensions are one of Hollywood’s best kept secret, used by celebrities, models and the like, you’ll surely be one step ahead and looking ever so fabulous.
Step 1 – Hair Prep and Cutting
When purchasing your hair weft, choose your length and color appropriately – I recommend Remy Hair Extensions as they are of great quality and long lasting. Measure the weft of hair from ear to ear. You will only want the weft to cover the back of your head. Halo extensions that come around or over your ear, will not look natural and will cause discomfort. Once you have found the ideal measurement, feel free to use your scissors and cut to the width to your desire. Depending on the thickness of your hair, you may want to cut 3-5 wefts of hair to the same width. If you are looking to go from short to extra long, 2 pairs of halo extensions can be worn to create a layered look. This will help create a natural illusion
Step 2 – Bonding the wefts
For this next step, you will need a bonding glue. I use Proclaim Super Bond Hair Glue as it applies easily, but there are many that you can use.
You will want to make sure that all the hair wefts are facing the same direction. Lay on flat surface and begin to apply the bonding glue onto the weft. Be sure to place the glue below the rubber ridge area and directly onto the hair. Let the glue dry for a bit until it is no longer wet but sticky. Then place the second weft on top of the first and continue with additional wefts, creating an accordion with all the wefts descending for a more flattened feel. Allow to dry.
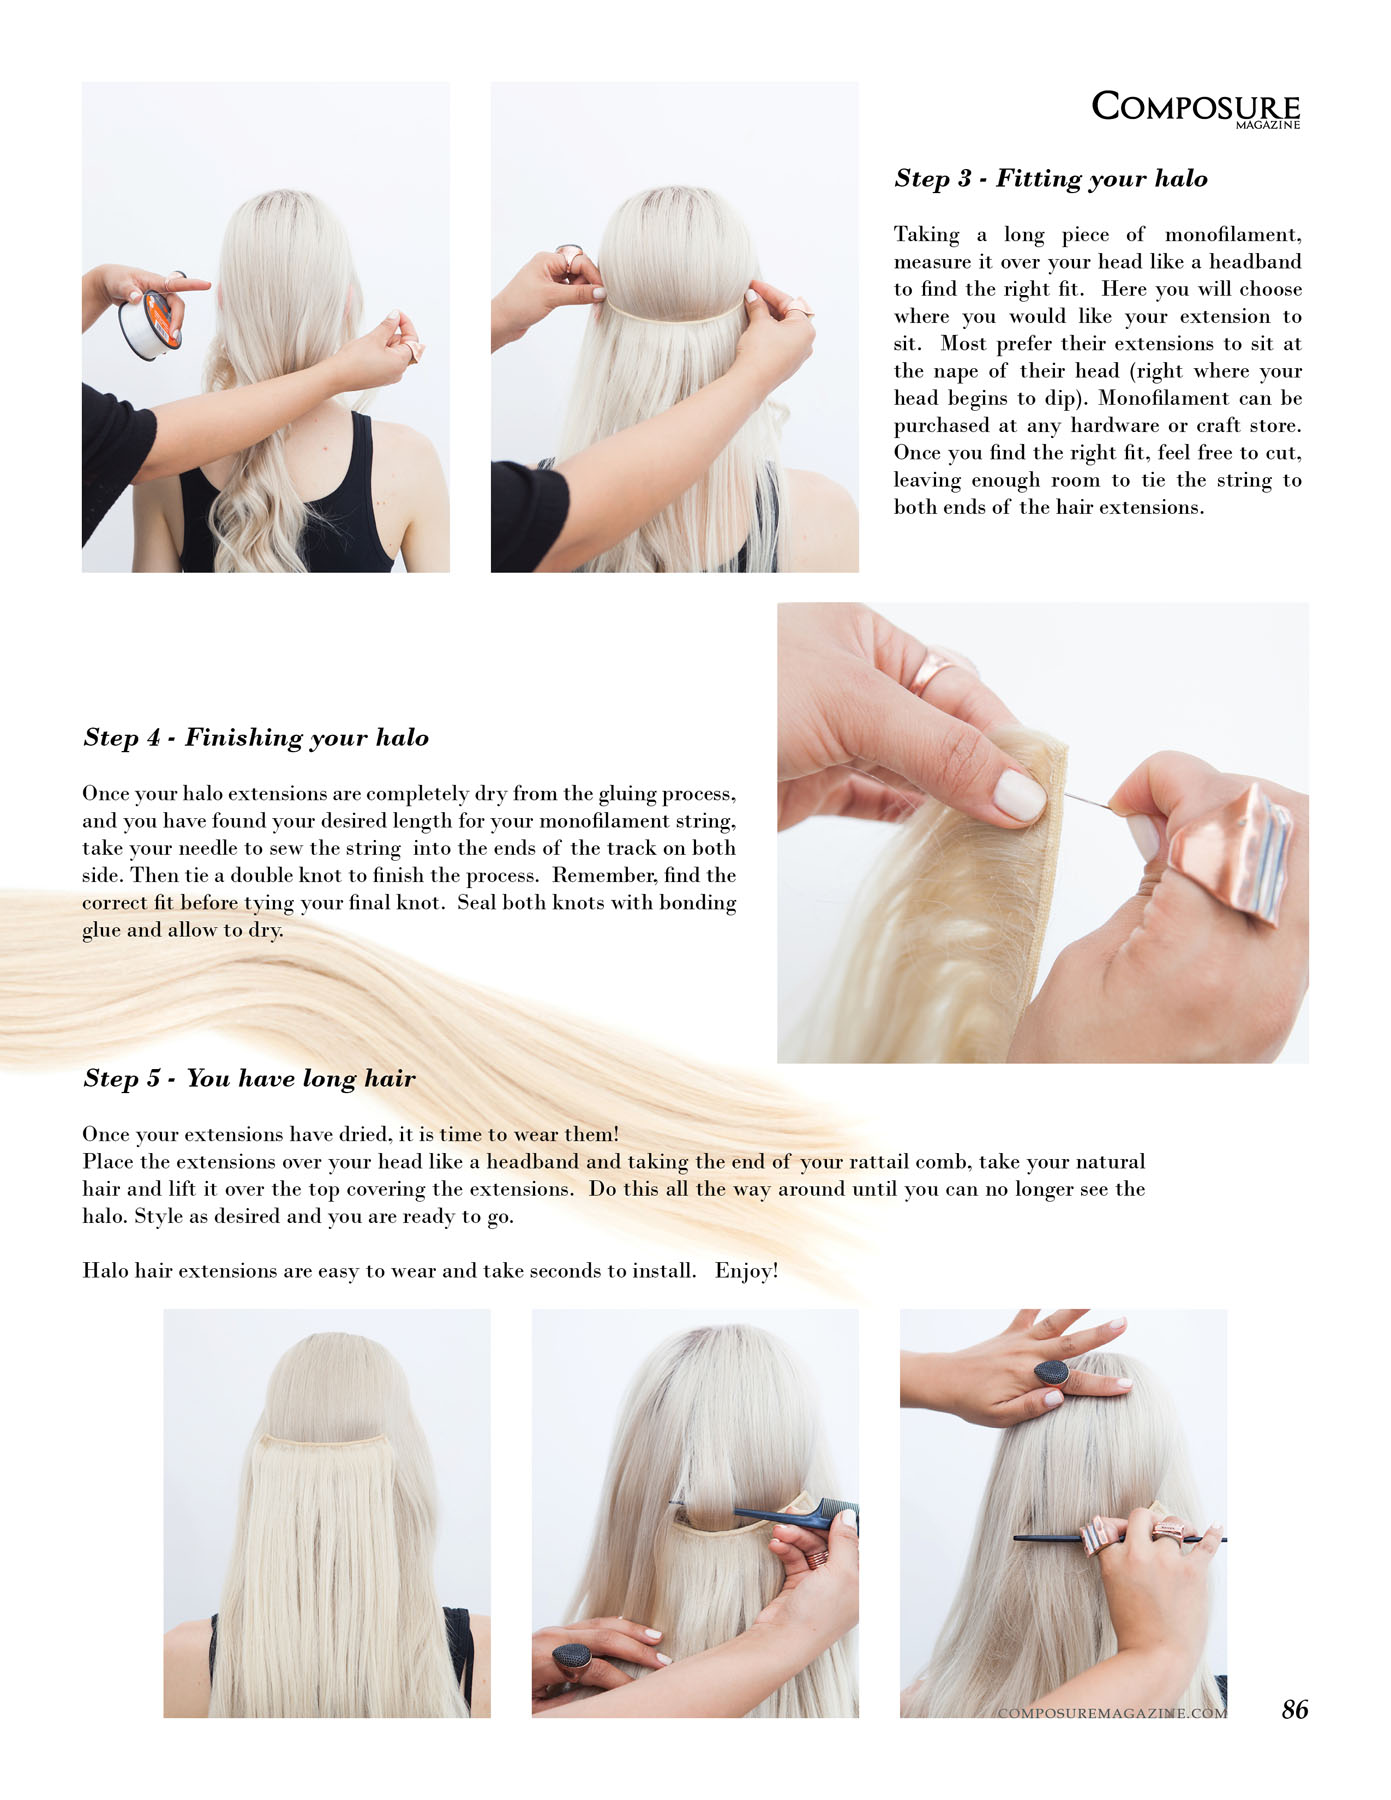
Step 3 – Fitting your halo
Taking a long piece of monofilament, measure it over your head like a headband to find the right fit. Here you will choose where you would like your extension to sit. Most prefer their extensions to sit at the nape of their head (right where your head begins to dip). Monofilament can be purchased at any hardware or craft store. Once you find the right fit, feel free to cut, leaving enough room to tie the string to both ends of the hair extensions.
Step 4 – Finishing your halo
Once your halo extensions are completely dry from the gluing process, and you have found your desired length for your monofilament string, take your needle to sew the string into the ends of the track on both side. Then tie a double knot to finish the process. Remember, find the correct fit before tying your final knot. Seal both knots with bonding glue and allow to dry.
Step 5 – You have long hair
Once your extensions have dried, it is time to wear them!
Place the extensions over your head like a headband and taking the end of your rattail comb, take your natural hair and lift it over the top covering the extensions. Do this all the way around until you can no longer see the halo. Style as desired and you are ready to go.
Halo hair extensions are easy to wear and take seconds to install. Enjoy!